As you know, working in the legal field often means dealing with a lot of paperwork. That is why redundant formatting when crafting legal documents can be a real pain. Performing the same job over and over is tiresome, boring, and obviously not an efficient use of your time. While little can be done about the volume of documentation you need to process, there are MS Word shortcuts that can ease your workload. So, if you want to take advantage of a few powerful MS Word features, read on to check out the hacks we’ve prepared for you.
Powerful Word Hacks That Will Improve Your Formatting
Before we get into the finer details, you’ll need to check your MS Word settings and make sure that the following features are enabled.
- Show/Hide formatting marks: This is the button that looks like a backward P, which can be found on the right side of the ‘Home’? tab.

- View Gridlines: To activate this feature you’ll need to insert a table and then go to the ‘View’? tab next to the ‘Table Design’?.

- Ruler: This checkbox can be found on the left side of the ‘View’? tab.

And presto! Now you’re ready to discover tips that will enhance the readability of your legal documents and save you time.
Word Hack #1
What do you do when you need to create a list of items neatly organized in two columns? Many users would even out the lists using a bunch of spaces and tab key presses, which results in a format that’s subtly misaligned.
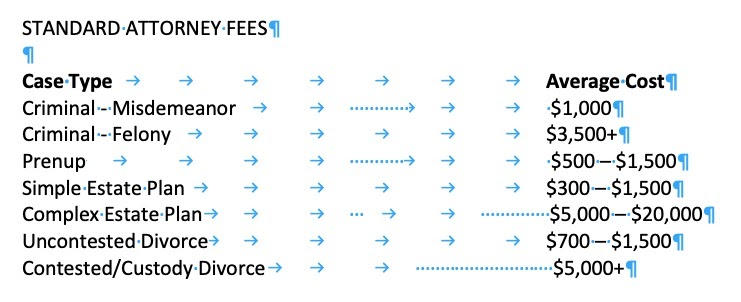
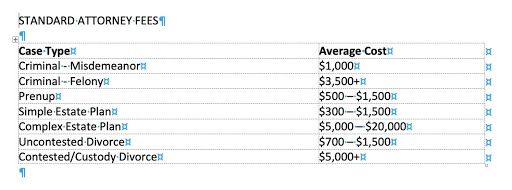
But there is a better method ‘? using a transparent table. Simply insert a 2×8 table via ‘Insert’?, ‘Table’?. Then, highlight the newly created table and go to ‘Table Design’?, ‘Borders’? and choose ‘No Border’?. Voila! We bet you’ll agree it looks much cleaner and easier to edit to boot.
Word Hack #2
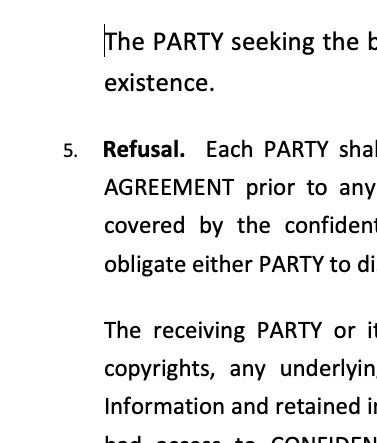
When we open a file, the first thing we notice isn’t the text itself, but the lines around the edges our eyes are drawn to. Ideally, all the indents should be similar across the whole document, so that your clients are not distracted from the contents – and their eyes don’t bleed.
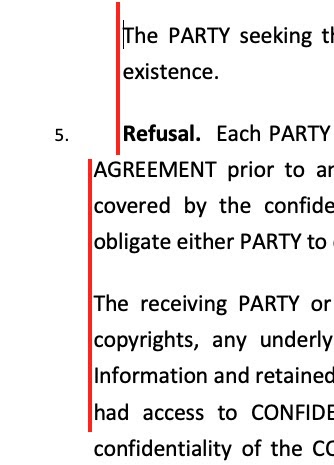
To see if the indents are consistent in your document, check the paragraphs against the ‘Ruler’? mentioned above. Or you can go to ‘Layout’?, ‘Indent’? to make sure everything looks perfectly aligned. And if everything isn’t perfectly aligned, our next tip will show you how to avoid the problem like this in the future.
Word Hack #3
Heading and first paragraph, list and introductory statement, address lines, ‘? these parts of your document should always be aligned together. If not, the readability suffers and the outcome you get is something like the example below.
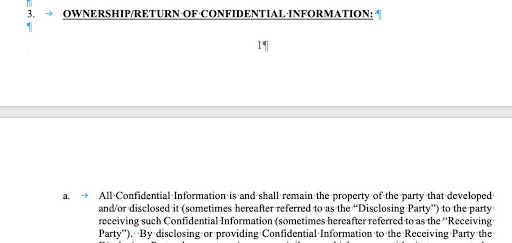
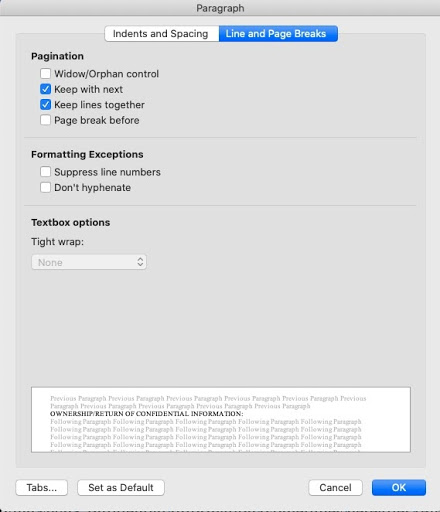
Yet, the solution to this kind of problem is pretty simple. Just go to ‘Format’?, ‘Paragraph’? and ‘Line and Page Breaks’?. There you will find two sought-after settings: ‘Keep with next’? and ‘Keep lines together.’? They will help you make your documents look neat.
Here are a few more handy keyboard shortcuts that can be useful for similar scenarios. Cmd + Enter (Ctrl + Enter) makes the next paragraph appear directly under the current one and copies its style (aka a non-breaking paragraph). To make a non-breaking space instead, use Option + Enter (Ctrl + Shift + Space).
Word Hack #4
Presenting information in a list greatly enhances document readability. But you end up with quite the opposite effect if you have multiple lists formatted using different styles. Mismatched style serves as a distraction and can irritate your reader. Before trying to manually correct every single difference, we suggest taking a look at ‘Copy formatting’?. This little brush button copies all the formatting from one paragraph and can be applied to other paragraphs so that they look the same.

A pro tip here would be just to double click on the brush ‘? once to apply the desired style, and once to copy the style of the corrected paragraph, ‘? so that you can format from paragraph to paragraph without stopping.
Word Hack #5
When you have to adjust a document with a number of annexes attached, some of the annexes may not be applicable to that contractor. You may think, why not simply delete them? The problem is, when you get rid of the unwanted annexes, the remaining ones have to be renamed, and references to those annexes in the main text will also need updating. Instead, this kind of task can be easily done by secret tools in your document management software.
Start by highlighting the name of the annex which appears first. In our case, this is Annex A. Then, go to ‘Numbering’? on the ‘Home’? tab. Press ‘Define new number format.’? You need to type ANNEX right before the letter A where it asks you to ‘Enter formatting for the number.’?
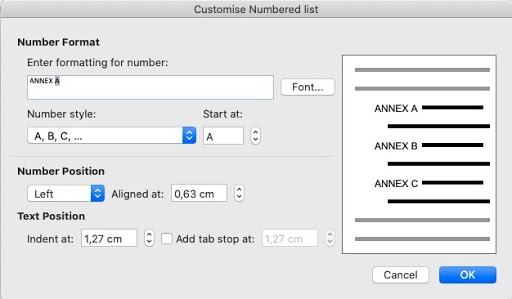
Now you’ve got Word set up to do the naming automatically, and when you remove an annex, the order of the rest won’t break anymore.
Word Hack #6
This hack should be helpful with standardized documents, like notices or requests. Their content goes largely unedited, with only client information changed. This is where Word’s Mailings functionality can come in handy. To check how it works, let’s create a test Excel file with client data.

Once the Excel file is made, go to Word document management software to open your standardized doc, then ‘Mailings,’? and ‘Select Recipients.’? In the context menu, select ‘Use an existing list,’? and then select the test Excel file. The last step is to add your fields with ‘Insert Merge Field.’? Our test file looks like this.

Once you press ‘Finish and Merge,’? you will have 3 individualized letters for those 3 people from the table. This is, however, a very basic feature that works only on letter-like documents.
If you want to get full automation of your workflows, contact us at AXDRAFT. We’ll help you build your custom enterprise document management software, tailored specifically to your company’s needs. With our help, you won’t need to spend hours doing mindless work customizing documents for your clients. Let the tool do the job, while you concentrate on other more important tasks.