


Remember those times when all your documents were neatly stored under C:\Users\username\Documents, and that’s where you could always find them?
Document management was far more straightforward back then. Simply because we had fewer options, which led to fewer roadblocks.
Today, with various databases, shared and private folders, hundreds of emails, multiple cloud storage systems, and corporate chats all being used to store and share contracts, there’s a lot more chaos in legal operations than we’d like. This chaos is worth hours spent on finding the information and getting it to the right person.
40% of people have reported that they spend ¼ of their time coping with routine work, which sums up to 10 hours a week on the average.
At the end of the day, this forces companies to spend extra money on repetitive and unnecessary tasks. Let alone the fact that this kind of work is not emotionally rewarding at all.
For the record, 40% of people have reported that they spend ¼ of their time coping with routine work. That is 10 hours a week on the average.

What we do at AXDRAFT is we give you those 10 hours back. And one of the ways we do so is through Projects functionality, which organizes and structures your contracts and document data.

What are Projects?
Generally speaking, a project is that folder inside your cabinet tagged with the name of your client. Except there is no physical cabinet, or folder, or hard copy document (so sadly, nothing to spill coffee on).
A project stores all of the data you saved when creating a document, and which is shared across all your documents in a workflow. Please be mindful that it only only works for the selected workflow.
This way, next time you draft a document, instead of entering the same data again, you can click “Draft automatically” and the document will be pre-filled with the saved data in all of the matching fields.
This option is useful when you have a series of documents for a single counteragent. Also when you want to save the information for further use.

3 ways you can create a new project:
Projects are vital for many processes within AXDRAFT, so chances are, you will be using them quite a bit. In some cases these projects are created in the background without your immediate action, but this is not always the case.
So here are the main paths you can follow to create a new project:
- When drafting a new document, after you’ve filled your template, you need to scroll down to the bottom of the page, enter the name of the project, and click “Magic” (because, you know, everything works with a hint of magic at AXDRAFT).
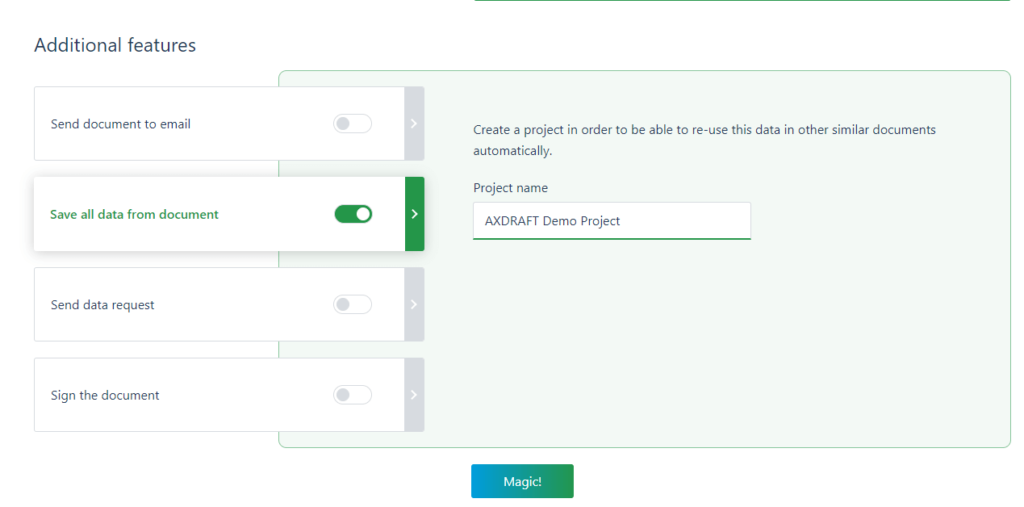
Your project will be created that very instant. Please note, however, that you will not be directed to the project page automatically. So you’ll need to navigate to the Dashboard or Projects section to access the project you’ve created.
- After populating your template with data, you need to enable collaboration mode, choose the administrator of the document, and click ‘Magic’? at the bottom of the page.

There, all set. Your new project is waiting for you in the Projects section.
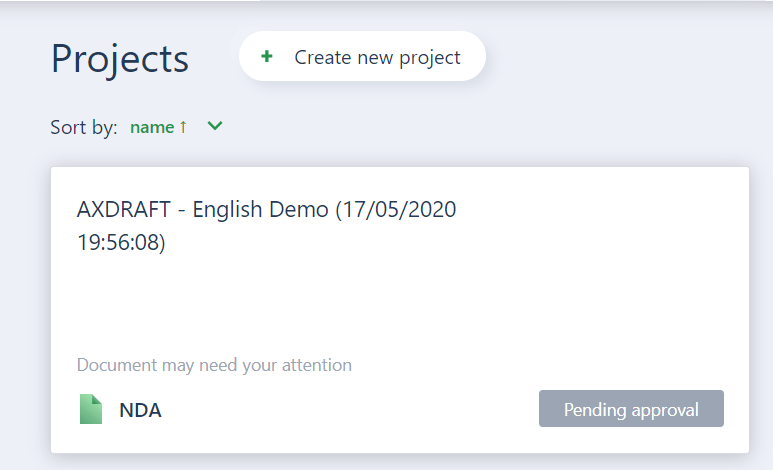
- Go to the ‘Projects’? section and click ‘Create new project.’?
This way is a little bit trickier, because next you’ll need to:
- Enter project name
- Add project description (which is optional, but we suggest you fill it to always know which data the project contains)
- Select a workflow that will apply to this project.
By the time you start working with AXDRAFT, you should have all your workflows set up for you. If none of the existing workflows match your new project, you can always create a new workflow or contact our team and we’ll do it for you.
What do I do next?
Enjoy the data at your fingertips, mostly.
But also, there are a few things that you can do with your new project.
- You can duplicate it. For any reason, you may need. Just click the icon at the top right corner of the screen.
- Access all of the templates associated with the selected workflow and which you can use the saved data for
Hint: you don’t manually select a workflow when saving data from the document or enabling collaboration because all your templates are already assigned to workflows.
- Edit project information: name and description. Can’t change the workflow, though.
- Upload external documents for collaboration.
- Invite another user to the collaboration. Just click ‘Access settings’? at the top right corner of the screen and select a user from the dropdown menu, or enter their email address.
- Track the status of your documents under collaboration and take the necessary steps in document approval flow if you have been assigned as an administrator, editor, or approver.
That’s about everything there is to projects. We hope it’s self-explanatory, but if some parts look like rocket science to you, please let us know and we’ll deep dive into details.
After all, we’re all here on the light side of the force, and document order is our ultimate goal.